Access CRM seamlessly via sidebar or relevant icon/button.
User-friendly initiation of a new client within CRM.
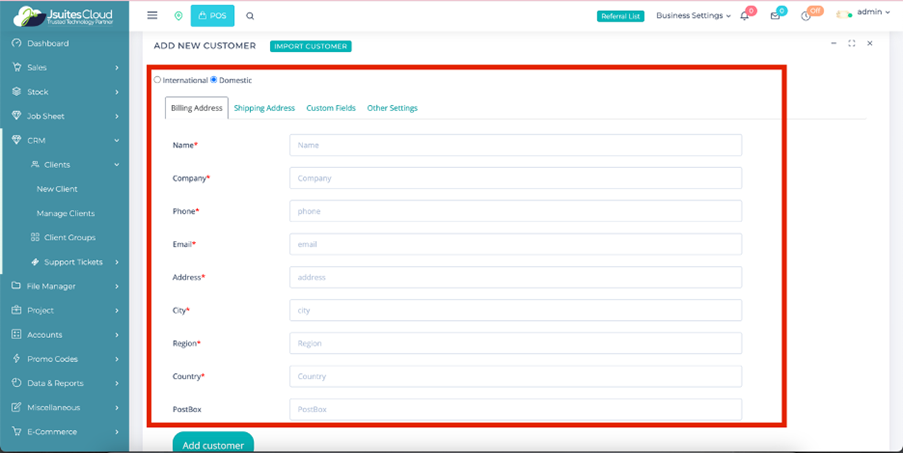
Comprehensive Client Information Form for detailed input.
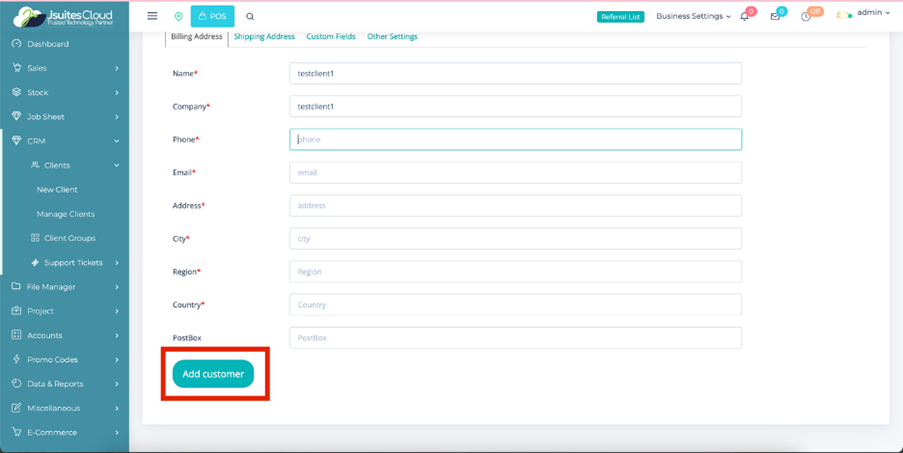
Quick confirmation of successful client addition.
Streamlined Client Management
Easy navigation to "Manage Clients" for a clear client overview.
Efficient organization of clients for quick reference.
User-friendly interface to view, edit, and update client details.
Confirmation messages for successful client management actions.
Dynamic Client Grouping
Accessible sidebar on the main dashboard for quick entry.
Intuitive grouping options under "Group Clients."
Create, edit, and manage client groups effortlessly.
Add clients to chosen groups for enhanced organization.
User-Friendly Group Management
Simplified access to "Group Clients" within CRM.
Add, edit, update, and delete client groups with ease.
Options for creating new groups and modifying existing ones.
Clear instructions for adding clients to specific groups.
Comprehensive User Guidance
Clear step-by-step instructions for every process.
Assistance through the CRM's Help section for additional support.
Accessible contact information for system administrator assistance.
Encouragement to explore and refer to the user-friendly manual for further clarity.
How to use the CRM
Log in
First things first, let’s get you logged in.
Access the system by entering your credentials.
Locate the sidebar on the left-hand side to begin your CRM journey.
Accessing CRM
Go to the main application interface and locate the “Sidebar” or relevant icon/button for CRM access.
Click on “CRM” within the sidebar to enter the Customer Relationship Management module.
Adding a New Client
Within the CRM interface, find and click on the “New Client” button or link to initiate the client creation process.
Fill in the client’s details in the provided form, including name, contact number, email address, address, company name (if applicable), and optional notes or comments.
Save the client information by clicking “Add Customer” or an equivalent action.
Confirmation and Review
After saving, review any confirmation message to ensure the successful addition of the new client.
Double-check the entered data for accuracy and completeness before finalizing.
Manage Clients
Navigate to the “Manage Clients” section within the CRM to view and manage your client list.
Access the newly added client’s information and perform actions such as viewing, editing, or deleting as needed.
Client Groups
Access the sidebar and click on “Group Clients” to work with client groups.
Create a new group by clicking “Add Group” or select an existing group to edit, update, or delete.
Group clients by navigating to the “Group Clients” section, selecting a group, and associating clients with the chosen category.